
- Where to find this Software
- Creating a New Graphic
- Opening an Existing Image
- Photoshop Work Environment
- Saving an Image for the Web
Where to find this software
Photoshop is available in all public computing labs located through out Campus including the Knapp Media Center and the Science Center library. This is a Keyservered installation and the program will only be available to use on-campus.
Creating a New Graphic File
Launch Photoshop, then File > New and a window will appear.
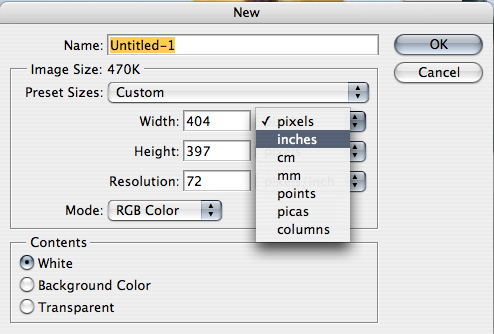
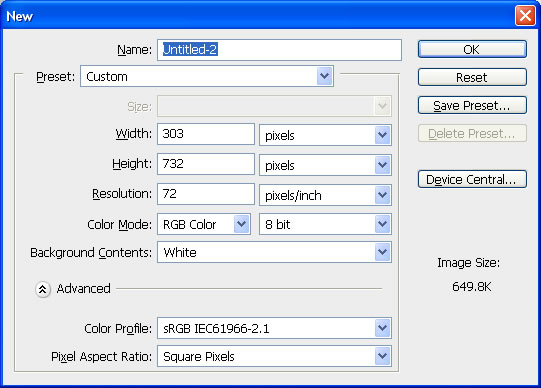
Type in the desired Name for your file. You can enter height and width in the Preset box. You can choose to set the value in pixels, inches, and other measurements by using the pull-down menus. This size can be modified later. (If you have copied an object into your Clipboard, the initial width and height values match the dimensions of that object.) Remember that some people who will view your graphic have monitors with low resolution so do not make your graphic wider than 800 pixels or higher than 600 pixels.
Resolution should always be set to 72 Pixels/Inch so that the new graphic will work with common monitor resolutions. If you will be printing a high quality copy of the image you may want to use a higher resolution.
Mode will generally be RGB color. Here you can also select how many bits you, (8, 16, 32 etc). If you wish to make a black and white image you may choose Grayscale from the pulldown menu.
Under Background Contents, select the color you would like for your canvas or background of your graphic. If you choose background color it will choose whichever is currently selected in the toolbar. Transparent is ideal for gifs or when you plan on overlapping this image with another. If you choose transparent your canvas will appear as gray and white checkered boxes.
When your New Document settings are complete, click OK. A blank document window will appear with the size and canvas color you selected.
Open an Existing File
Launch Photoshop, then from the File menu select Open. Navigate through the folders and files on your computer to the graphic file you want to edit, then click Open. Your graphic file will appear in a Photoshop document window.
Photoshop work environment
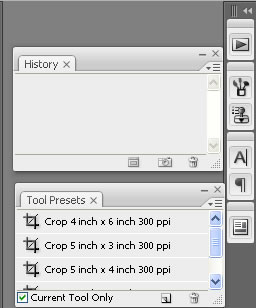
After beginning a new graphic or opening an existing graphic file in the document window you will also see other windows : A toolbar, layers, history and several others. These windows can be moved, closed or minimized just like any other window on your computer. The toolbars on the right, such as the history and action toolbars, are preset and joined together. If you want to have each toolbar have its own window rather than selecting them and having them temporarily viewed, you can click and drag whatever toolbar you want out of the list.
Tool bar as a manageable list.
![]()
Toolbar with tool presets and history dragged out.
If at anytime you lose a panel or would like to see what panels you currently have open select Window from the top of the screen and a list of choices will appear. If a checkmark appears next to the name it is currently active.
At any time, if you want to temporarily hide all panels, click in the document window and type the TAB key. Type the TAB key again to bring the panels back. You might want to do this so that you can enlarge the document window and view a larger area of your graphic.
![]()
The Tools
If you do not see the tool bar go to Window > Tools.
Buttons for tools are organized into categories. Hover the pointer over any button to read its description and click a button to select that tool.
    First Category : Selection and Cropping


    Second Category : Editing and Image Manipulation


    Third Category : Text and Shape/Design Creation


    Fourth Category : Object and Color Selection
The two overlapping boxes are the foreground and background colors. Click the top box to change the foreground color and the bottom for background.
A small black triangle next to a tool means that it is part of a tool group. Click and hold your mouse button to choose from a tool group.
Working with Layers
The Layers window usually appears in the lower right hand corner of the Photoshop screen. It can be opened by selecting Window > Layers. This feature allows you to create graphics with overlapping images, colors and text. Each layer is represented in order by a column with the layer name and thumbnail. The parts of a layer that are transparent appear as gray and white boxes.
The most left column in the window has a row of eye icons. If you click on the eye it will disappear and the layer will not be visible (great if you want to try a lot of variations). Click again and the layer comes back into site.
The next column has many empty boxes and usually one with a paint brush tip. The paintbrush indicates the "active" layer. You cannot move, edit, adjust or copy from a layer unless it is the active layer. A selection that you make with a tool in one layer will carry over to whatever layer is currently active. You can select a layer for editing by clicking on it in the Layers window.
The last layer when you open an existing image is usually labeled the Background layer and it will have a small lock on the right side of its row. This means that the image in the layer cannot be moved and the layer itself must stay at the bottom. You can lock any layer in place by selecting that layer and clicking the icon that looks like a lock in the Layers window.
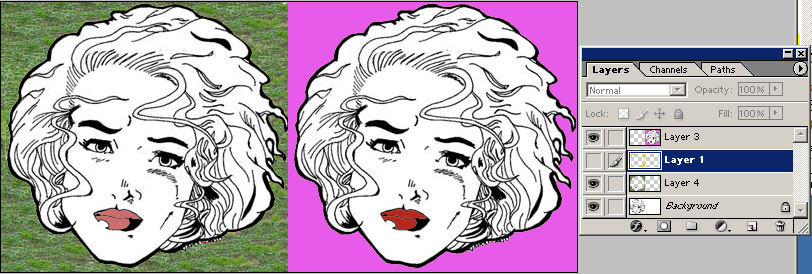
There is a pull-down menu box that will default to Normal in the Layers window. Choosing another selection will turn on a filter that will create varying contrasts between the layers. Some of the filters change colors and saturation depending on brightness, hue and other factors. Changes you make to a layer will affect only those below it. Play with them but save changes before you do.
If you want to be able to "ghost" a layer over another, or allow the bottom image to show through the first then lower the Opacity of the top image. It will preview as you vary the layers.
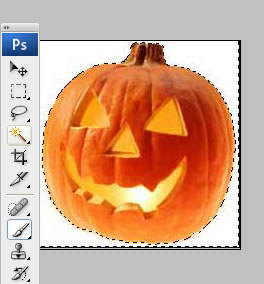
Selecting Part of an Image
Using the lasso tool, you can draw around around the part you wish to select it, or if you wish to select an area that has a similar color, you can use the Magic Wand Tool. Select the magic wand, then click on the part of the image you wish to select. The wand will select areas in the image that are similar to it, based on the Tolerance you have selected. The higher the number in the Tolerance field, the less similar the part of the image have to be to your selection, thus, more will be selected.
To highlight the opposite of what you have selected, right click and click on Select Inverse from the menus.
Saving an Image for the Web
You can save your document as a Photoshop document by selecting File > Save. You can save it other formats by selecting File > Save As...
If you wish to save the image for use on the web, select File > Save for Web... You can choose a format (GIF, JPG, PNG) and a quality setting that will affect final file size as indicated in the lower lefthand corner.

If there's any possibility that you will wish to do further image editing, save a larger, uncompressed version you can use later.